Saturday, 9 October 2010

Fixing GAC when Shfusion.dll does work with c:\windows\Assembly in Windows 7

Hello,

I just had to publish this, countless hours spent over this trying to figure out what the heck was wrong with a project not compiling in Visual Studio 2010 using CrystalDecisions Assemblys, namely:

CrystalDecisions.CrystalReports.Engine
CrystalDecisions.Shared

Everytime i tried to compile it would give out an error:

"Type ReportDocument is not defined"

When all the correct references were being made in project properties. So what could be wrong?

As my investigation went by i realise that i could not properly see the usual assembly listing contents, instead i would see the files and folders normally and tought there could be a relationship to that.


Rapidly i found it's relationship to a nice file named shfusion.dll
Altough it does not help directly with this issue, you can read more about it here:

But, trying a regsvr32 C:\Windows\Microsoft.NET\Framework\v2.0.50727\shfusion.dll would return that shfusion.dll was loaded, but the DllRegisterServer entry point was not found.

Exporting the corresponding registry keys from a healthy PC did not help

This usually happens when user has no permisssions to write to the corresponding registry keys but i was running command line with administrative permissions and the same command worked on a good PC from this standpoint.

Later, i tried to fully remove .NET Framework and it was then that i realised that removing .NET Framework 4 from my system would restore the correct operation for shfusion.dll . Surely, later i read that shfusion.dll was deprecated in .NET Framework 4, but other systems had it and it continue to load properly.

With .NET framework uninstalled, now, of course Visual Studio wouldn't even start as it is based on WPF which is provided by Framework 4:


I reinstalled Visual Studio 2010, and SHFusion.dll stoppped working again, so there must be a relationship with the .NET Framework 4 bundled with this installation i tough. I fully uninstalled once again the Framework 4, and then installed it directly from microsoft . While installation was going i noticed some KB's being applied that seemed bug fixes so i tough there was a hope, and voila, there was:


After this it was piece of cake, just loaded my project and recompiled with correct references in the project propeties and back in track again for productivity:


I really hope this may help a lost soul out there as there were just no answers for this on the internet while i was searching.


Taken from: http://bitboard.blogspot.com/

Saturday, 4 September 2010

Step-by-Step Installing RALUS - BackupExec 2010 Remote Agent for Linux on Ubuntu 8.04

These steps should work as equally with Debian, as Ubuntu is based on Debian.

To find out the distribution version of your Ubuntu installation do:

cat /etc/issue
or
cat /etc/apt/sources.list

Now let's get going, the version of RALUS i will actually install is RALUS_RMALS_RAMS-2896.9.tar.gz :
(It's located in LinuxUnixMac Folder of your Backup Exec 2010 DVD Disk)
Copy the RALUS TAR.gZ to a folder of your choice and extract the files:

Note: To avoid Prerequisite warning ( Step 4 ) install libstdc++5 first on Ubuntu. ( Steps 4, 5 and 6 )

1.tar xzf RALUS_RMALS_RAMS-2896.9.tar.gz


2 Run ./installralus

3. Enter hostname
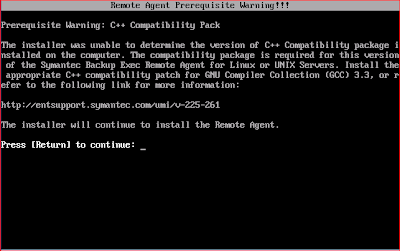
4. Prerequisite warning about libstdc++5 . Stop Installation using Ctrl + C if needed


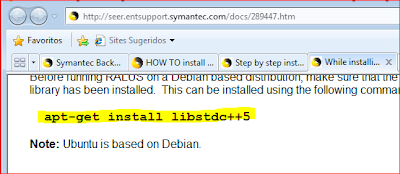
A warning regarding missing libstdc++5, shows up, install it using apt-get
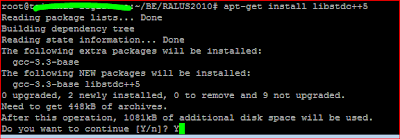
Apt-get install libstdc++5 (internet connection probably required )


5. Continuing installing the libstdc++5:

6. Verifying the correct installation with aptitude:
7. Re-initiate installation:
 

8 and 9. Enter Hostname desired and Continue

10. Continue

11. Press enter to continue 

12. Press enter to continue


13. Enter the directory host’s IP address, this is the media’s server IP address ( the server for where to send


14. Press enter to continue
16. Checks and whatever :

17. Yes - Continue 


18. No - Press enter to continue

19. Press enter to continue

20. Says VRTSRALUS no installed, Press enter to continue and proceed to VRTSRalus installation

21. Press enter to continue

22. Finished installing. Time to start services

23. Starting service:

24. Verifying if service is set to auto start already. ( It is)


By this time the media serve already as visibility for the linux remote agent if the linux remote agent can successfully advertise it self trough port 6101, see below:


Your firewall should be configured accordingly. Here, are my configurations on TMG , where the Linux Box stands on a DMZ and the Media Server on the LAN:

From the Media Server to RALUS:


From the RALUS to Media Server ( Outbound 6101 Advertisement Only) :

If however you don't like this enormous port range, you can tweak theses settings on the Media Server Job Defaults.
Here you select which ports you want to use for Control/Data Transmissions. By default, the ports are all ephemeral ports:


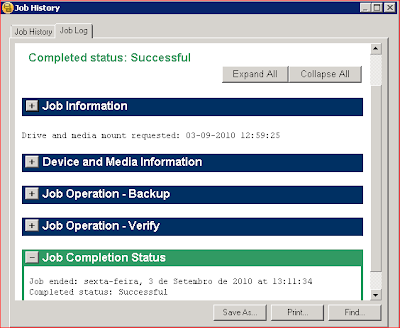
Finally create a BE Job and give it a try. The first time the job ran for me I got a completely successful with exceptions, being the exceptions mysql files that were locked and couldn’t be backed up.
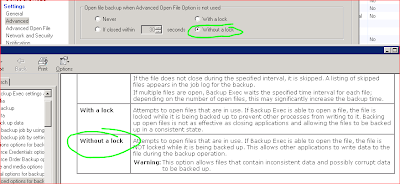
There is a setting under the job’s advanced tab that allows you to configure the option Without a lock that will solve these exceptions, description below:


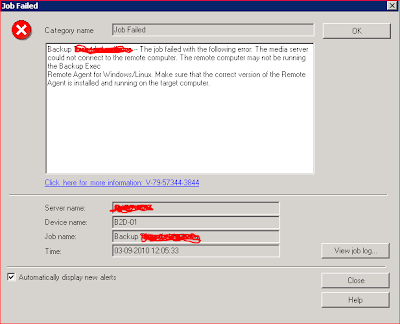
However, I later decided that I wanted to change the hostname for the linux remote agent  machine and the backups were not being successful anymore. After changing the hostname in ubuntu ( painlessly trough the hosts file ) the job would still fail:


I latter found that there were leftovers on the job itself pointing to the old hostname. So all I had to do was delete that job and create another one and restart the services ( just to be safe )

Stopping all services and starting them again:

Start all BE services after...and


Mission acomplished

Sunday, 2 May 2010

PHP file_exists function bug and Domain Migration

First of all, no, this is not a Bug report. Just a friendly title to someone who might be asking themselves the same thing.

The other day i was reported that our Intranet website was not working properly. I looked at the PHP code to see if everything was in order and runned a few tests with variable placing inside the file_exists and the function was returning false when the file actually existed. Why is this i asked?! Eventually i found out, there was no bug or change in the code.

We had at our corporate environment migrated the domain and Intranet was running smoothly for 2 weeks. At the end of the 2 weeks the old domain was shutdown. Only by the third day this Intranet communication came to me, but the answer was that in the IIS manager for the Intranet Server, whe still had issues with the "Directory Security", pointing to a user from the old domain.

The file_exists was trying to access the path with a user that was no longer valid, returning false on the function as it had no permissions.

Voilá
Hope it helps


Taken from: http://bitboard.blogspot.com/

PostgreSQL "Export to file"

How to export Postgres query results to a CSV file:

1 - Press SQL Editor Icon
2 - Make query
3 - From the SQL Editor Icon, File -> Export


Taken from: http://bitboard.blogspot.com/

Can't add ODBC entry

The answer for this is simple, the tool to manage ODBC entry's on Windows is ODBCAD32.exe

If you can't add an entry on the SYSTEM DSN tab the first thing you need to remember is that you have to run the tool with administrative provilidges to be able to add entrys in this tab. Otherwise the only tab you will have permissions to add entry's to will be the USER DSN.

This obviously is because the tool needs to change registry key's and the SYSTEM DSN is in the Machine Scope wether the USER DSN is in the USER scope.

To run the tool odbcad32 with admin privilidges without logging off that current user's account you can do the following at the command line:

C:\> runas /U:domain\adminuser odbcad32.exe
and enter password


Taken from: http://bitboard.blogspot.com/

10 Steps to totally and completely Remove Panda Anti Virus Protection Service from Computer or Server

I decided to add this here first so i won't forget, second so that anyone experiencing the same issue and is tired of looking for the web with no success on this, can apply the procedure i tell you here, and move on to be productive.

Well, how to fully remove Panda Services from the computer?
Why you would want to remove it?

For the second question, you might want to add a new protection from other company and would like to clean the dependencys from the previous one. OR, you happened to have a previous version of Panda Admin Secure and installing a new version does not successfully update all the clients. Or better still, you can't update Panda clients after you have migrated the domain, and freshed install the new version of Panda Admin Secure onto a new server.

Panda is installed on the client side at the following location:
%ProgramFiles%\Panda Software\

There is a file at %ProgramFiles%\Panda Software\Panda Administrator 3 called DServers.ini but changing it to the right server won't change a thing.

So, onto the removal:

There are some approaches that i have gatthered here, there, panda security forum, etc, but i have compiled it all to suit every scenerios to become completely removed , resulting in a always successfull fresh client install after that.

Step 1
Create a distributable package on your latest version of AdminSecure Console and save it to your hard drive. After that, you will have two files, named ConfPavAgent.ini and Pavagent.exe. Edit the ini file in notepad and change "action=install" to "action=uninstall"


Step 2
With the INI file saved, run PavAgent and let it do it's job. It might take a while, 15 minutes is an average on some computers.

Password is panda in lowercase letters
Extract the contents and run \ClientShield\RemoveALL with administrator privilidges. Altough the warning it says that is not responsible for any damage etc, i have run it successfully in dozens of computers and servers. It will take a few seconds to complete, as it works in the windows registry to remove certain keys.

Step 4
Open regedit and go to key HKEY_LOCAL_MACHINE\SYSTEM\CurrentControlSet\Services\ Check if there are any services left starting with PAV and if so, remove them:


Step 5
Go to Device Manager -> View -> Show hidden devices . Check if there are still any hidden devices installed, if so remove them, don't restart yet when it asks:


Step 6
There is a Panda NDIS filter installed in each Network connection you have. Go to the connection properties and uninstall this filter with administrative privilidges:


*Any network Connection will be temporarily lost while removing this filter

Step 7
Reboot

Step 8
Delete PAV*.* and ShlDrv51.sys from C:\windows\system32\drivers

Step 9
Delete %ProgramFiles%\Panda Software and %ProgramFiles%\Common Files\Panda Software folders . IMPORTANT: Any quarantined file will be deleted as the restore folder is deleted, so if you want to keep any important file you have that may have been blocked and want to restore it, you should try to trestore it first.

Step 10
Check with the tool XSAid3 if there are any registered services left (started or stopped ) and if so remove them and reboot.

Your system will be now cleaned and ready for new client distribution.

One last note, Windows Firewall might be an obstacle to successfully distributing clients remotely, temporarily turn off Windows Firewall or enable Remote Admininstration on the firewall service rules.
Thanks for reading.

Taken  from: http://bitboard.blogspot.com/

Sunday, 28 February 2010

○ Programming a MXM graphics module bios (by performing a hard flash).

In a previous post we talked about how to revive a dead GPU card using the tweezer method. In this post you will se further info to complement that revival using eeprom programmable cards, credits will go to Michal.T and we will quote is own words, so let's get started:

Situations may vary when people are left with a not functional mxm graphics module/card. The most common situation should be considered like the consequence of notebook vendors commercial/marketing policies (those policies which are limiting their products by allowing only certain graphics modules/adapters to work); people then are trying to overcome such a situation by trying to flash many and untested bios images for their graphics modules hoping such a move will solve the software incompatibility issue.

I tried such a move and got an unusable mxm graphics card. My intention was to overcome the annoying "MXM bios structure error message" at boot time which was forcing the system to post such message for 30 seconds.

People at mvktech.net site have understood how to fix the performance table of such adapters that are going no longer than the throttle frequencies and voltages, but this is another story and it covers how to let adapters like the nvidia 9600m gt one to work correclty at full speed. If the software flashing procedure went wrong in most cases we have as result a "broken" piece of hardware, we know however that we only bricked the bios (the hardware is not responding).

At first we have to try the tweezering method which consist in shortcutting pins 1 and 4 of our adapter's bios eeprom just when powering on the system.If such a method is going to work we should have a black screen with a full prompt command responding system; this means we would be able to flash the card again. The tweezering method however is not guaranteed to work every time and with all the adapters and hardware around. A hard flash in some cases is the only solution to let revive the hardware.

Such a step is not simple and people with no soldering/desoldering experience should ask others to perform such a task.

We have at first to desolder the mxm graphics module eeprom: it is usually represented with a Macronix MX25L512 chip on the top-left adapters's corner. See Fig.1 and Fig.2


Fig. 1


Fig.2

Then we need a good eeprom programmer, there are many. I have built myself a Willem rel. 6.1 one some time ago. It was when I broken my old notebook bios by putting my hands were I should not :)

Once we have a programmer we need to understand if it is capable to hard flash the Macronix chip; I had to order from a chinese shop an adapter that was suitable for.


The adapter I took is a Xeltek SA 602A. See Fig.3, Fig.4, Fig.5 and Fig.6


Fig.3
 
Fig.4

 
Fig.5

Fig.6

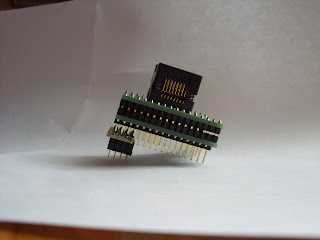
As you should see I had to built a second adapter that was allowing the Willem eeprom programmer recognize the Macronix chip. (see the top-most bottom pins configuration)


I was not sure I could use the zif socket to perform the flash procedure so then I wrapped the Xeltek adapter on a 8 pin adapter to let match its pins configuration with the socket I had to use for. See Fig.7

Fig.7

The software version that is making the willem eeprom programmer recognizing the SPI chips is the 0.98D10 version. Once I put on the adapter with the eeprom mounted in place the flash procedure was very simple. see Fig.8, Fig.9, Fig.10 and Fig.11


Fig.8

Fig.9


Fig.10

Fig.11

The last step was to resolder again the eeprom chip back in place. At last a software flash should be required due to a bad checksum calculated during the hard flash procedure. "

Many thanks once again to Michal for providing this, if you like italian you can also check his blog where he tributes a great novel writer who left this planet a few years ago.
 
 
Taken from: http://bitboard.blogspot.com/

Saturday, 16 January 2010

○ oPEn Shell Menu and Network drive with Access Denied

If you can't access a network drive trough My comnputer saying "Access Denied" and you see a "oPEn" entry when you right click this network drive,  you may be having difficulty accessing this network path when navigating to "My computer" in Explorer. This behaviour in my experience can be left overs from malware for instance. Specially if you log in with other domain account and there you can access it.

Now if you are familiar with regedit and windows registry you would think that you could just do a search in regedit and query for "oPEn", bad news is regedit.exe is not case sensitive (at least mine is not at this moment)  so i got a tool that allowed case sensitive searches trough the registry and it led me here:
HKCU\Software\Microsoft\Windows\CurrentVersion\Explorer\MountPoints2\##server##folder\shell\oPEn

Then, just deleted the ##server##folder and all other sub-keys entry and recreate the nework drive by the traditional means.

Hope this helps. Be carefull tough, only delete when you absolutely know what you are doing.

○ Restarting server shares service for network folders

Different network shares can exist in a server environment. If you happened to restart one of your main server that had shared network folders active and not anymore, you have to restart the corresponding services.

To check what resources are being shared on the server type at the command prompt:

"net share"

To see a list of your previously shared network folders on the server open regedit and go to:

SYSTEM\CurrentControlSet\Services\LanmanServer\Shares

These are the folders you need to reshare again right?

If so all you have to do is to restart these share services you need to restart the "Server" service along with this service dependencys.

Solved. Hope this helps
 If you need additional help read this:

Tuesday, 12 January 2010

○ Renaming User accounts in AD and changing Documents and Settings Folder

Yes, this is from microsoft, it is just so I won't forget i know i can easily find this on my corner :D

Reference: http://support.microsoft.com/kb/236621/en-us

Identify the user's profile path. There are two methods to identify the profile path. Either by user path settings or user SID. The user SID method is preferred.


User SID method


Use the GETSID tool from the Windows Server Resource Kit to obtain the SID. Use syntax similar to the following example:


GETSID \\SERVER1 UserName \\SERVER1 UserName


Once you obtain the SID, use Regedit.exe or Regedt32.exe to select the user's SID under the following registry key:


HKEY_LOCAL_MACHINE\SOFTWARE\Microsoft\Windows NT\CurrentVersion\ProfileList
 
 
Some Other SID Tools i Like:
 
user2sid
sidtouser
 
:)